{source}
{source}
{source}
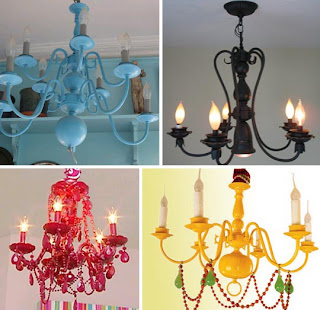
Since the room isn't decorated in traditional girly colors, I felt that there needed to be plenty of feminine features in the room. So, I wandered through several home improvement stores and perused lots of websites in search of the perfect chandelier for the room. Unfortunately everything was out of my price range and there really wasn't anything that I loved for the room. I was quite frustrated and about to start looking for alternatives when I had an "aha" moment. Why not repurpose an old chandelier instead (like the old one we had in our dining room and we got rid of, ugh!!). So off to Craigslist I went and I found THIS advertisement! It was exactly what I was looking for!!! And, even though a prefinished one was out of our price range, it made me realize that what I wanted could be done. After a bit more perusing through the ads, I found an ad for a brass chandelier that fit my requirements exactly, $20 and an hour later I was on my way to getting this done.
After picking up additional supplies from Lowe's, JoAnn's, and Hobby Lobby, I was in business. The longest part of the makeover was painting the chandelier. First we lightly sanded, wiped down, and taped off the lighting fixtures. Then we started lightly coating it with Valspar's Blue Lagoon spray paint. Between the chandelier and the medallion, we used 2 cans. I loved the color, but I wish I'd used Rustoleum spray paint instead. I found that Valspar's glossy spray stays tacky to the touch and didn't allow for a completely smooth and glossy finish.
Once we let the paint dry thoroughly, then I added all the beads and bling. I couldn't find aqua beads at any of our local craft stores, so I dyed them instead. To do this, I placed the beads in a ziplock bag with about 5 drops of Ranger's Alcohol Ink in Sail Boat and then I smushed the beads around in the bag until they were all coated evenly. I laid them on a dry paper towel to dry and they were ready to use in less than 5 minutes.
To string the beads, I tied nylon beading thread to a small jump ring and alternated large and small beads in clear and aqua. I used about 28 beads in each size to get the right length for this chandelier. I tied off a second jump ring to the other end and each section was complete. To attach them, I used my Crop-A-Dile to punch holes at the top and on each arm of the chandelier and used small pliers to open and insert the jump rings into the holes.
I finished off the dip in each arm with clear oval drop beads using the nylon thread to attach them directly to the chandelier. And voila, a beautiful custom lighting fixture for less than your average ceiling fan.
Cost breakdown:
Chandelier - $25 on Craigslist (would've been free if I'd thought to keep our old one!)
Medallion - $19.97 at Lowe's
Spray Paint - $7.96 at Lowe's
Beads & Supplies - $22.50 at Hobby Lobby and JoAnn's
Total Cost: $75.43
Thanks for stopping by!


No comments:
Post a Comment